Guide
Water Under a Viking Refrigerator: Tracing the Leak
If your Viking is leaving a puddle at its base, the culprit is nearly always a clogged defrost drain tube, a cracked or shifted drip pan in the machine compartment, a weeping water line or filter that serves the ice maker and dispenser, or worn door gaskets letting in moist air that turns to extra frost. Each source leaves its own pattern, so a dry floor, a few paper towels and a flashlight usually narrow it down before anyone has to pull a built-in out of its opening. In Poway kitchens, where a Viking is often trimmed in with custom panels, finding the source quickly matters more than mopping, because a slow drip can spread under flooring well before it shows at the toe kick.
Start with a dry floor and a paper towel map
Before blaming any single part, let the leak show you where it lives. Mop the floor completely dry, then lay a row of folded paper towels along the front of the kickplate and, where you can reach, a few tucked under each side. Look at them after a few hours and again the next morning. A wet patch only at the front center usually means the water is coming from inside the cabinet, either through the defrost system or from the ice maker. Dampness that creeps in from one side or from the back points toward the supply line, the shutoff valve or even the plumbing under a neighboring sink. Towels that get wet only after a day of heavy door use suggest condensation rather than a failed part. Jot down what you find and at what time, because that short record will save a technician real diagnostic time.
- Wet at the front center: defrost drain, ice maker or an overflowing pan
- Wet at one side or the back: supply line, valve fitting or filter housing
- Wet only after a busy day: door seals and condensation
A blocked defrost drain fills the cabinet first
Several times a day a frost-free refrigerator warms its evaporator coil to melt the frost off it, and the melt runs down a trough, through a narrow drain tube, and into a pan in the machine compartment, where warm air dries it out. When crumbs, a bit of mold or a plug of ice closes that tube, the water has nowhere to go. It gathers under the crisper drawers or on the freezer floor, freezes into a sheet, and eventually spills over the front lip and onto your floor. The telltale signs are standing water beneath the produce bins, a ridge of ice along the bottom of the freezer, or frost that looks thicker than normal on the rear wall. A freezer that has iced over like this often cools poorly as well, because air cannot pass through a frozen coil. If heavy frost is showing up alongside the leak, our page on why frost keeps building up in the freezer explains the related causes.
The drain pan and the machine compartment
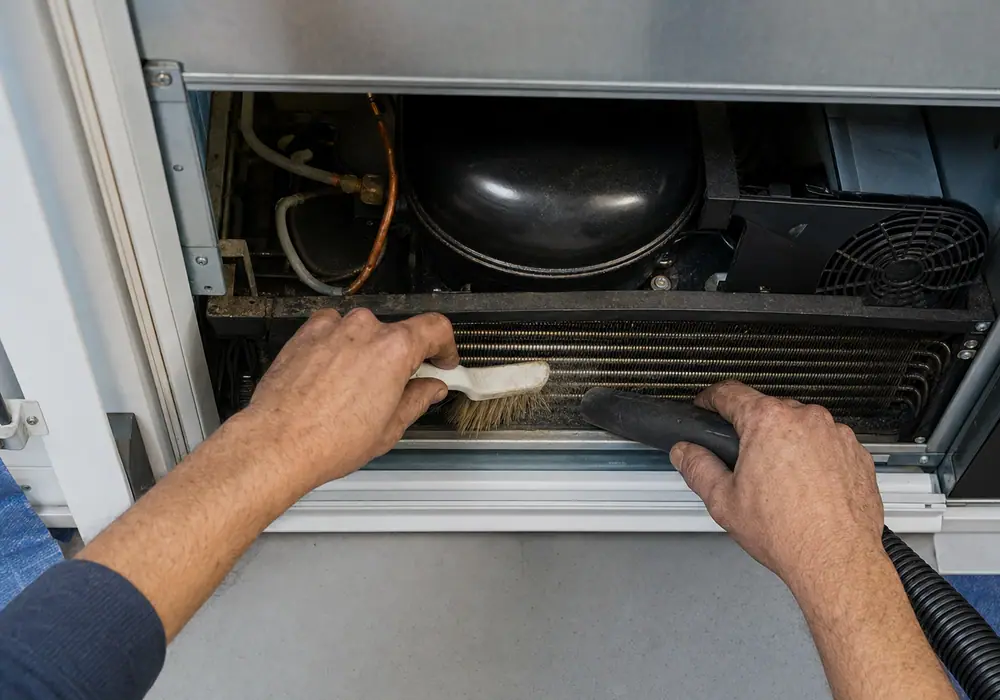
The pan that collects defrost water is shallow on purpose, since it only has to hold the melt from one cycle while heat and moving air evaporate it. On a built-in Viking it sits in the machine compartment, behind the grille or the kickplate depending on the model, and it can get knocked off its bracket during installation, after a move, or while someone is cleaning the condenser. A pan that is cracked, tipped or resting crooked lets every defrost cycle drip straight onto the subfloor, which is why this kind of leak tends to appear as a small, regular puddle with no ice inside the cabinet at all. The pan also depends on the condenser fan and the warm coil to dry it; if that fan has quit, the water arrives faster than it leaves and the pan overflows. A cabinet that is out of level causes trouble too, because meltwater runs to the low side of the trough and misses the drain opening. On Viking's VRI and VFI integrated units, a blinking CL in the temperature display is the refrigerator asking for its condenser coil to be cleaned; Viking recommends doing that every 6 months and clearing the reminder by holding the up and down arrows for 3 seconds.
- Check the cabinet with a level, side to side and front to back
- Confirm the pan is seated on its bracket with no cracks at the corners
- Listen for the condenser fan running whenever the compressor runs
Supply line, shutoff valve and water filter
A Viking with an ice maker or a door dispenser is plumbed into the house, and that plumbing is the other common source of a wet floor. For its FDREIC integrated refrigerators, Viking calls for a 1/4-inch copper water line at 20 to 120 psi, and plenty of local installations still run copper with compression fittings at the wall valve, which can weep quietly for months. Poway's tap water is hard, like most of what San Diego County delivers, and mineral scale can stop an inlet valve from closing all the way, so it drips or overfills the ice tray. The filter deserves a look as well. On the VRI and VFI integrated models, the RWFDISP cartridge lives at the bottom right behind the door and comes out with a quarter turn counterclockwise; one that never got turned fully home can seep at the housing. Older built-ins covered by manual F20413, such as the VCSB423 and VCBB363, want a fresh cartridge every nine months or after 750 gallons, whichever comes first. Our ice maker and water supply service page covers repairs to this side of the refrigerator.
- Run a dry tissue along the line and around the valve at the wall
- Reseat the filter firmly, then press the lit FILTER button to reset its reminder
- Close the shutoff valve if a fitting is actively dripping and will not stop
Door seals and the open-door alarm
Gaskets do not leak water on their own, but a seal that no longer closes tightly lets warm, moist kitchen air into the cabinet, and that moisture turns into frost on the coil and more meltwater for the drain to move. A door left slightly ajar overnight can hand the defrost system more water than it can clear by morning. The displays on FDREIC and FDBMIC7360 integrated units will read Upper unit open or Lower unit open once a door has stood open for a few minutes, which is a handy clue when a puddle follows a busy afternoon of cooking. The 5 Series manual suggests washing built-in gaskets every three months with mild detergent or 4 tablespoons of baking soda in a quart of warm water, then wiping on a light film of petroleum jelly so the rubber stays flexible. If a gasket looks torn or flattened at a corner, our guide to testing a door gasket with a strip of paper shows how to check every edge.
What you can safely check yourself
The first round of checks needs no tools. Pull out the crisper drawers and look for standing water or ice under them, then check the freezer floor for an ice sheet. Make sure both doors swing shut on their own and that nothing on a shelf is holding one open. Glance at the settings too: a 5 Series comes out of the box with the fresh-food side at 38°F and the freezer at 0°F, and a reading far warmer than that alongside a leak hints at a frozen coil rather than a plumbing drip. Feel around the supply valve and the filter housing. What you should avoid is chipping ice near the coil with a knife or screwdriver, pouring boiling water into a drain you cannot see, or sliding a built-in out of its opening. These refrigerators are heavy, anchored to the surrounding cabinetry against tipping, and connected to water and power behind panels that dent and scratch easily.
- Fine to do: dry the floor, map the drip, reseat the filter, wash the gaskets
- Fine to do: shut the water valve if a fitting is actively leaking
- Leave alone: ice on the coil, pulling the unit out, anything behind the rear panel
When the leak needs a technician
It is time to book a visit when water keeps returning inside the cabinet after you have cleared the drawers, when the freezer floor ices over again within a few days, when the valve or line is leaking somewhere you cannot reach, or when the leak arrives together with rising temperatures or new noises. Ice that keeps coming back in the drain usually means the defrost heater, its thermostat or the control board is not finishing the cycle, and confirming which takes a meter and the model's service information. A dripping inlet valve means drawing the refrigerator forward and replacing the valve, which on a paneled built-in is best left to someone who has handled one before. If water is anywhere near an outlet or the wiring in the machine compartment, unplug the unit or switch off its breaker before you clean up. You can reach Poway Sub-Zero Repair Experts at (858) 630-4145, and our Viking appliance repair page has more about the brand.
Questions
Answers before you call
Why is my Viking refrigerator leaking water?
Most Viking leaks trace back to a blocked defrost drain, a drain pan that is cracked or out of place, or a weeping supply line, valve or filter housing. Water under the crisper drawers or ice on the freezer floor points to the drain, while a damp floor at one side or the back points to the plumbing. Mapping the drip with paper towels overnight usually tells you which. Poway Sub-Zero Repair Experts takes those calls on (858) 630-4145.
Can a loose water filter cause a puddle under my Viking refrigerator?
Yes, a filter that is not fully seated, or one with a cracked housing, can seep water that trickles down and collects under the unit. Take it out, look at the seals, and twist it back in until it stops firmly. If the cartridge is overdue on its replacement schedule, swap it while you have it out. That is a two-minute call to Poway Sub-Zero Repair Experts on (858) 630-4145.
Why is my Viking refrigerator leaking and not making ice?
When a Viking stops making ice and leaks at the same time, the inlet valve or the water line is the first suspect. For 5 Series built-ins, Viking's own checklist is to confirm the signal arm is down in the on position, the freezer is cold enough, the water valve is open and the line is not leaking. After a restart the freezer can need overnight to get cold enough. Poway Sub-Zero Repair Experts, Poway: (858) 630-4145.
Appliance down in Poway?
Tell us the brand and what it is doing — we can usually name the likely repair before we arrive.